Man Set with 2 Stagger Screens
While the action looks simple on the surface, its beauty lies in its spatial manipulation, timing, and how it forces the defense to constantly shift its eye lines.
Phase 1: The Entry and the Eye-Line Distraction
-
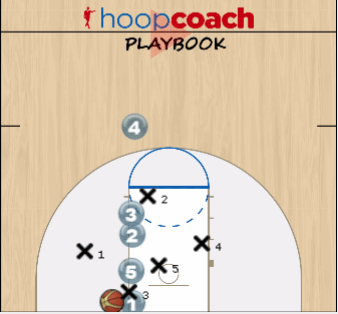
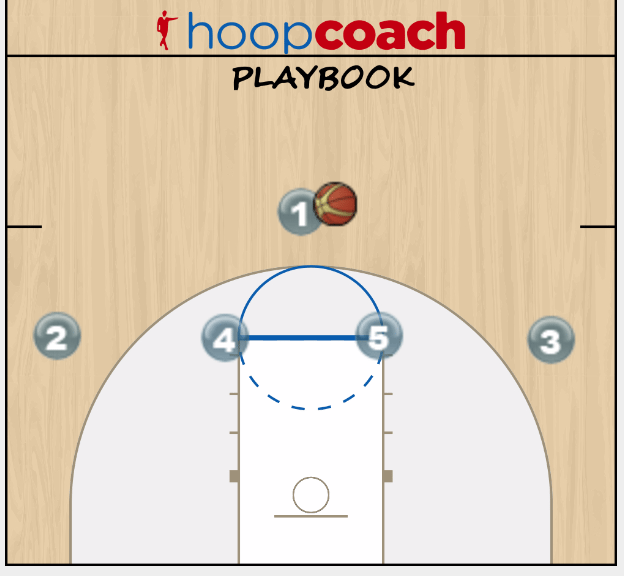
The Setup: We start in a traditional 3-out, 2-in alignment. Player 1 operates at the point, Players 2 and 3 hook the wings, and our bigs (4 and 5) occupy the low blocks.
-
The Trigger: Player 1 enters the ball to Player 3 on the left wing.
-
The Coach’s Take: This simple wing entry is just the bait. The real magic happens away from the ball, designed to exploit defenders who turn their heads to watch the pass.
Phase 2: The Staggered Cut and Spatial Exchange
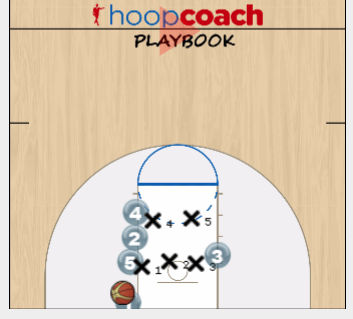
This is the heart of the set. As soon as the ball hits Player 3’s hands, three things happen simultaneously:
-
The Hard Dive: Player 1 cuts hard down the center of the lane, dragging their defender into the paint.
-
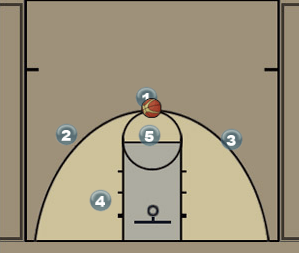
The High Flash: Player 5 flashes from the weakside block straight to the top of the key.
-
The Baseline Burner: Player 2 vacates the right wing, cutting along the baseline underneath the low block to fill the ball-side corner.
Why this works: Look at the staggered vertical alignment created by Player 4 (low block) and Player 5 (high post/top of key) during this transition. This vertical stack forces the defense to navigate multiple layers of traffic. If the defense plays a “pack-line” style or sags, Player 2 is wide open in the corner, and Player 5 has a clean catch at the arc.
Phase 3: The Hub Reversal
-
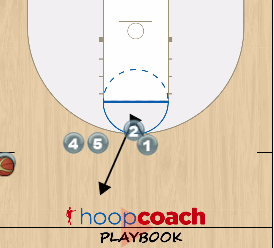
The Action: Player 3 skips the ball back up top to Player 5.
-
The Nuance: Player 5 acts as our offensive “hub.” By catching the ball at the top of the key, Player 5 completely neutralizes the defense’s help-side positioning. The defense, which just loaded up on the left side to stop Player 3 and the corner cut, must now scramble back to neutral.
Phase 4: Exploiting the Weakside
-
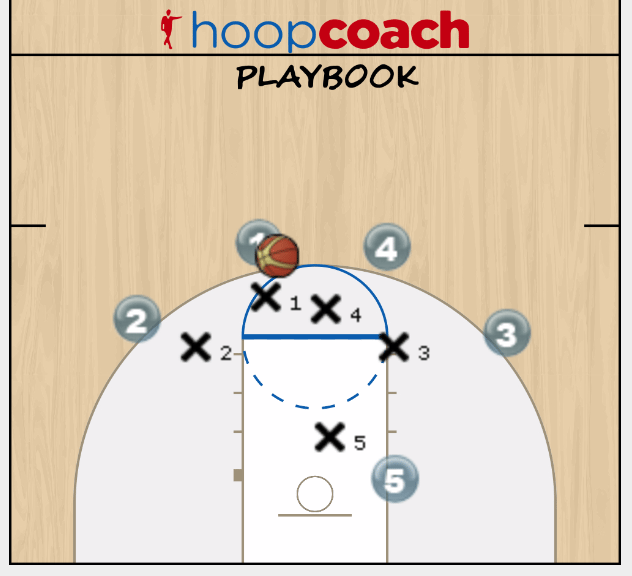
The Finish: Player 5 quickly swings the ball to Player 1, who has completely relocated to the right wing after their initial basket-cut.
-
The Result: Player 1 catches the ball with immense space. The primary defender is forced into a long, desperate closeout across the floor, opening up immediate opportunities for a catch-and-shoot rhythm jumper, a hard blow-by drive, or a quick hi-lo entry to Player 4 or 5 sealing their man inside.
💡 Key Coaching Takeaways for Your Playbook
-
Pace the Cut: Player 1’s initial cut cannot be lazy. It must be an aggressive sprint to force the defense to collapse into the paint, which ultimately creates the airspace for Player 5 and Player 1 on the perimeter.
-
Emptying the Corner: Notice how Player 2 clearing out to the opposite side completely opens up the right side of the floor for Player 1’s eventual catch. Spacing isn’t just about standing apart; it’s about moving into vacant territory.
Download the PDF diagram or view the animation