Playbook Breakdown: Wing PnR / Weak-Side Stagger
If you want to compromise a tough man-to-man defense, you can’t just run one action and hope for the best. You have to force the defense to communicate, navigate screens, and make impossible choices on the weak side.
This set is a staple because it initiates with a UCLA cut to occupy the help defense, flows directly into a strong-side ball screen, and punishes the defensive “tagger” with a backside staggered double screen.
Here is the breakdown of the action, the reads, and what you need to demand in practice to make this work.
The Action: Step-by-Step Execution
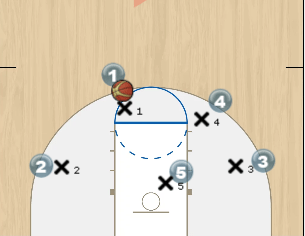
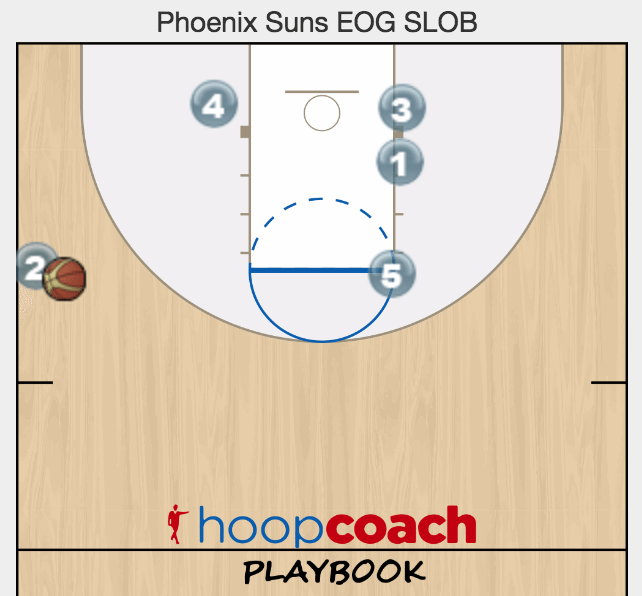
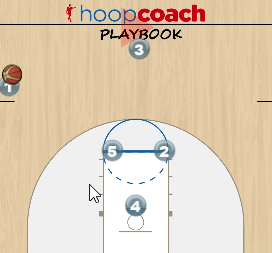
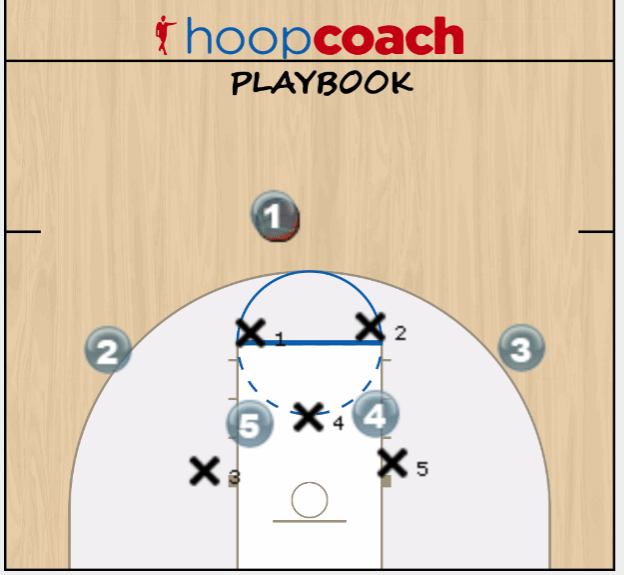
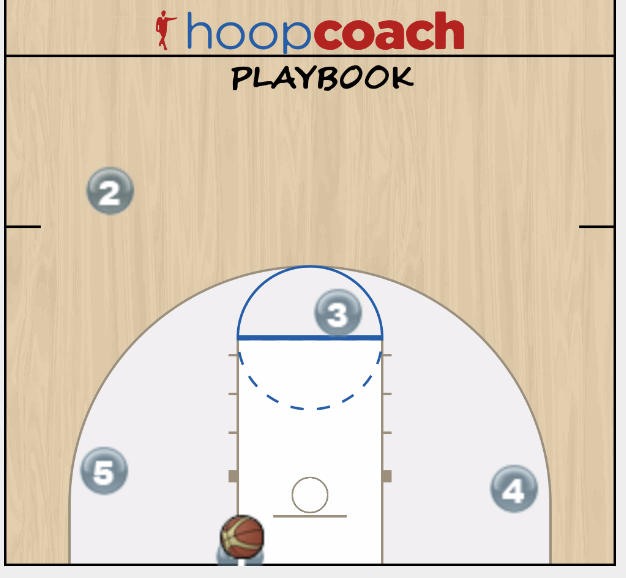
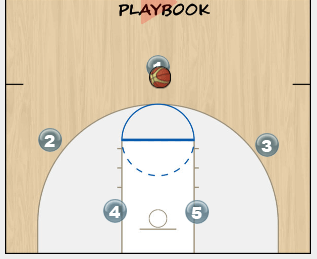
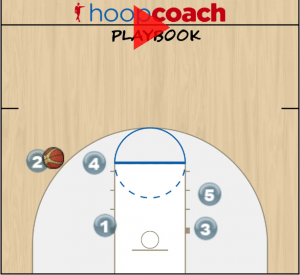
1. The Setup (The UCLA Cut) The possession starts with the 1 hitting the 2 on the wing. Immediately upon release, the 1 makes a hard UCLA cut off the 4 stationed at the high post. The 1 needs to clear all the way down to the strong-side block. We aren’t necessarily looking for a post-up here; the goal is to drag a guard into the paint and occupy the nail defender.
2. The Primary Action (Wing PnR) As soon as the 1 clears, the 4 turns and sprints to set a hard wing ball screen for the 2. We want the 2 coming off this shoulder-to-shoulder, looking to attack the paint and force the big to step up.
3. The Backside Action (The Stagger) This is where the play makes its money. While the ball screen is happening, your 5 and 3 are setting up a staggered double screen on the weak side. The 1, who has been holding on the block, sprints baseline and curls off the stagger. The timing has to be perfect—the 1 should be coming off that second screen right as the 2 is turning the corner on the strong side.
The Reads for the Ball Handler
The 2 guard is the quarterback on this possession. They have to read the ball-screen coverage and make the right decision instantly:
- Read 1: Turn the Corner. If the defense is in drop coverage or tries to go under the screen, the 2 needs to be aggressive. Turn the corner, get downhill, and force the defense to collapse, or pull up for the jumper if they give you space.
- Read 2: Hit the Roll Man. If they hard hedge or try to blitz the ball handler, the 4 has to slip or roll hard to the rim. The 2 needs to string out the trap and hit the 4 on the roll before the help defense can rotate over.
- Read 3: Skip to the Shooter. This is the counter to good help defense. If the weak-side defense gets sucked in to tag the rolling 4, they are dead in the water. The 2 throws the skip pass across the court to the 1, who is stepping off the double screen for a rhythm three.
Practice Non-Negotiables
If you run this in a game and it blows up, it’s usually because of a breakdown in one of these three areas. Rep these in practice until they are muscle memory:
- Hold Your Water on the Block: The 1 cannot bail out early. If they sprint to the stagger before the ball screen is set, the spacing shrinks, and the defense can switch everything. Wait on the block, then sprint.
- Screening Angles: Your bigs (4, 5, and 3) have to head-hunt and set legal, wide-based screens. A slipped screen on the stagger ruins the skip pass option.
- Pace of the Pass: The skip pass to the 1 has to be on a line and in the shooting pocket. No floating passes that let the defense recover and close out.